Website reviews are all about clear communication, and that's exactly why website annotation is essential. It's the difference between vague feedback like "this doesn't look right" and precisely showing what needs to change on each page.
Whether you're getting feedback from your team on an internal project or collecting client input, being able to annotate directly on the website transforms abstract suggestions into actionable changes.
How most people annotate websites today has some serious drawbacks:
- Using some native desktop screenshot app to take a screenshot of the website and send it in an email or add it to a document. This approach quickly turns into a mess of scattered feedback. Email threads grow endless, with important points getting buried along the way. Nobody really knows which version is the latest, and trying to collaborate becomes a game of email ping-pong.
- Using a browser extension. While this is probably one of the most common approaches today, it's essentially just moving the screenshot process into your browser. Yes, you avoid switching between apps, but all the communication headaches remain the same. Plus, there's an even bigger issue - these extensions only work on desktop. In 2024, when more than 50% of web traffic comes from mobile devices, being unable to annotate on mobile is a serious limitation.
And then there's the third option - what we'll focus on today. The professional way of using tools. Yes, it's 2024, and of course there are tools specifically built to annotate websites. They're called website annotation tools.
Below, we'll look at Feedbucket - our own website annotation tool that was built after running hundreds of website reviews when I was running a web agency. It includes features like:
- Annotate a website without leaving the site or installing any extensions. On all devices!
- A way to organize all this feedback.
- Collaboration tools to better take action on the annotated feedback and much more.
You can create a free 14-day trial, or keep reading below to see a step-by-step guide on using Feedbucket to annotate a website.
How the website annotation tool is installed plays a huge role
Remember those screenshot tools and browser extensions we talked about earlier? While they're great for quickly marking up any website (especially ones you don't control), they come with some serious limitations when you're working on your own projects.
Let me paint you a picture: You've just finished building a new internal website and need feedback from your colleagues. Or maybe you're at an agency, and you need your clients to review their site before launch. This is where those desktop apps and browser extensions start to fall apart. Here's why:
- First, there's the whole installation dance. Try explaining to non-tech-savvy clients or team members why they need to install yet another browser extension. Trust me, I've been there - it doesn't usually go smoothly.
- Then there's the mobile problem. Browser extensions? Desktop only. Sure, you can emulate mobile devices in your browser, but anyone who's done serious website reviews knows that emulated views often tell a different story than actual mobile devices.
- And here's the biggest headache - these tools help you mark up a website and take screenshots, but then what? How do you actually share that feedback? How do you keep track of everything? These tools completely miss the mark when it comes to communication and collaboration.
This is exactly why we took a different approach with Feedbucket. Instead of forcing everyone to install something, you simply add a script tag to your website - just like you would with Google Analytics.
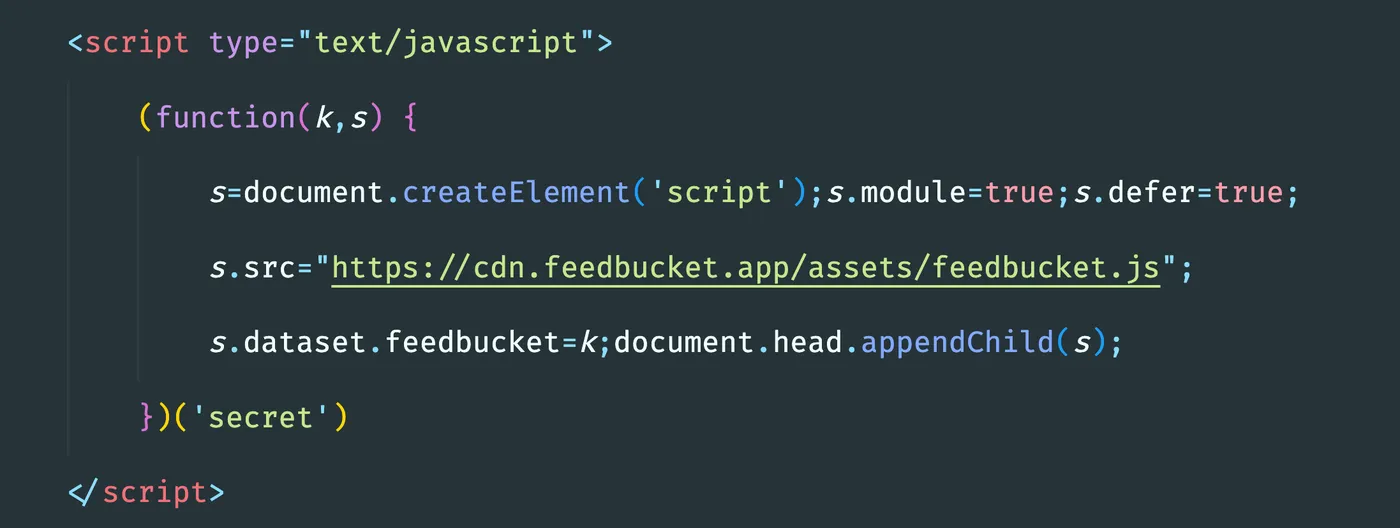
Install Feedbucket by adding our script tag to the website. If you're using WordPress, you can use our Plugin.
Installing directly on the website changes everything:
- Your team members or clients get all the annotation tools automatically just by visiting the site. No downloads, no installations, no friction.
- It works exactly the same way on every device. Want to test how that new feature looks on your actual iPhone? Just pull out your phone and start annotating.
So here's the bottom line: If you're just marking up websites for yourself or need to annotate sites you don't own, stick with browser extensions. A great browser extension for this is Markup Hero.
But if you're working on your own website and need others to give you feedback, installing it directly on the site is the way to go.
Alright, now that we've got it installed, let's look at how to actually use it to annotate your website.
Annotate and markup the website without any extensions, on all devices
With Feedbucket installed on your website, you get all the annotation tools you need, right in your browser, no extra installations required.
Let me show you how it works.
Think of your website as a canvas. Need to draw a circle around that misaligned button? Add an arrow pointing to that spacing issue? Place a rectangle around that whole section that needs work? You've got all these tools at your fingertips when making comments on a web page, right where you need them.
Just point, annotate, and add your comment. It's that straightforward.
Check out how smooth the process is on desktop:
I know I've mentioned a few times that Feedbucket works on all devices, but I wanted to show you as well. Take a look at how the same annotation tools work on your phone - no apps to download, no extensions to install, just pure functionality right in your mobile browser:
But here's where the magic really happens - it's what goes on behind the scenes when you hit that "submit" button. While you're focused on marking up what needs to change, Feedbucket is quietly gathering all the context your team needs to understand and act on your feedback.
We automatically capture:
- A precise screenshot of your annotation, exactly as you saw it
- The specific page URL
- Your browser details
- Device type (mobile, desktop, tablet)
- Screen resolution
- JavaScript console logs for catching those tricky errors
- ... and plenty more technical details your developers will thank you for
Trust me - after years of decoding vague feedback like "the button looks wrong," having all this context automatically included is a game-changer. Your team gets exactly what they need to understand and fix issues, without having to ask for screenshots or device details.
Communicate and collaborate on the website annotations
Let's be honest - when you're annotating a website, it's rarely just for yourself. You're trying to communicate something to someone else - maybe feedback to your team, a review for your client, or instructions for your developers. The annotations help you get your point across clearly.
But here's the thing - getting those annotations right is only half the battle.
Think about what happens when you use browser extensions or native tools. You're probably emailing screenshots around, or maybe dumping them all into a Google Doc. Sounds familiar, right?
Now, watch what happens when you've got multiple pieces of feedback flying around. Need to ask a follow-up question? Before you know it, you're 40 emails deep into a thread, nobody knows what's been agreed on, and important points are getting buried in the chaos.
And that's just with one stakeholder. Add a few more people to the review process? That's when things really start to unravel.
This is exactly why we built Feedbucket to handle both parts of the equation. Yes, it's a powerful annotation tool, but it's also a complete system for organizing and collaborating on that feedback. When installed on your website, you get a clean, simple view of all submitted feedback, complete with comments, tags, statuses - everything you need to keep the conversation flowing.
Here's something else we learned running a web agency: most teams already live in their project management tools like Asana, ClickUp, or JIRA.
That's why we built deep two-way integrations with all these tools. Your team can stay right where they're comfortable, managing and collaborating on feedback without jumping between different websites.
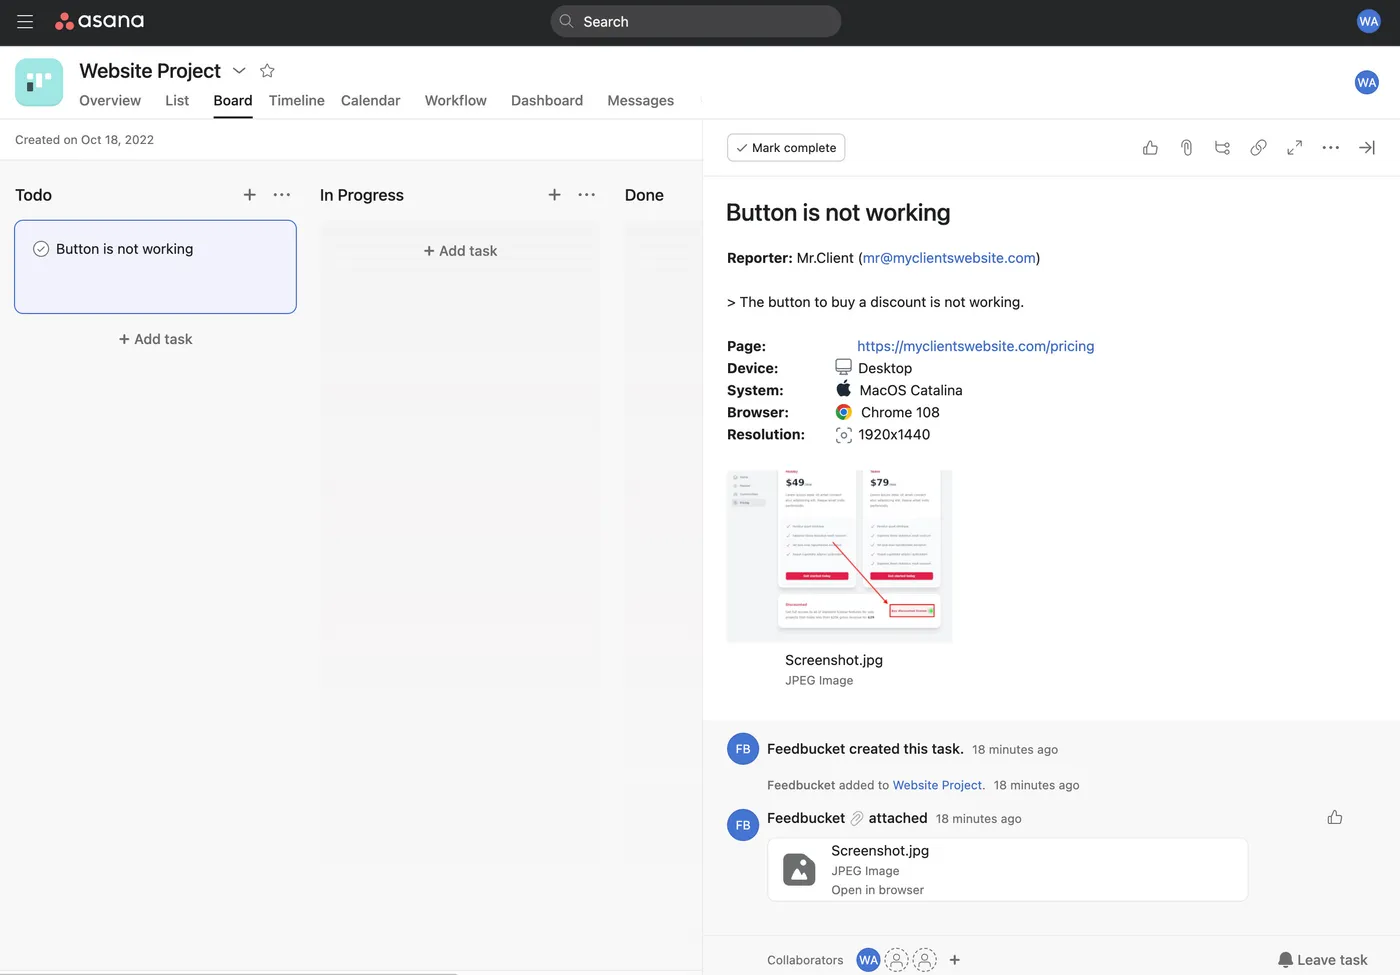
The feedback created as a task in Asana with all details. Asana is just an example. There are lots of other other integrations.
And here's a common headache we've solved: duplicate feedback. We've all been there - multiple stakeholders reviewing a website, and nobody knows what's already been reported.
Our solution? Feedbucket places visible pins on the website wherever notes have been added. When someone comes to add their feedback, they can instantly see what's already been covered. Instead of creating duplicates, they can just join the existing conversation.
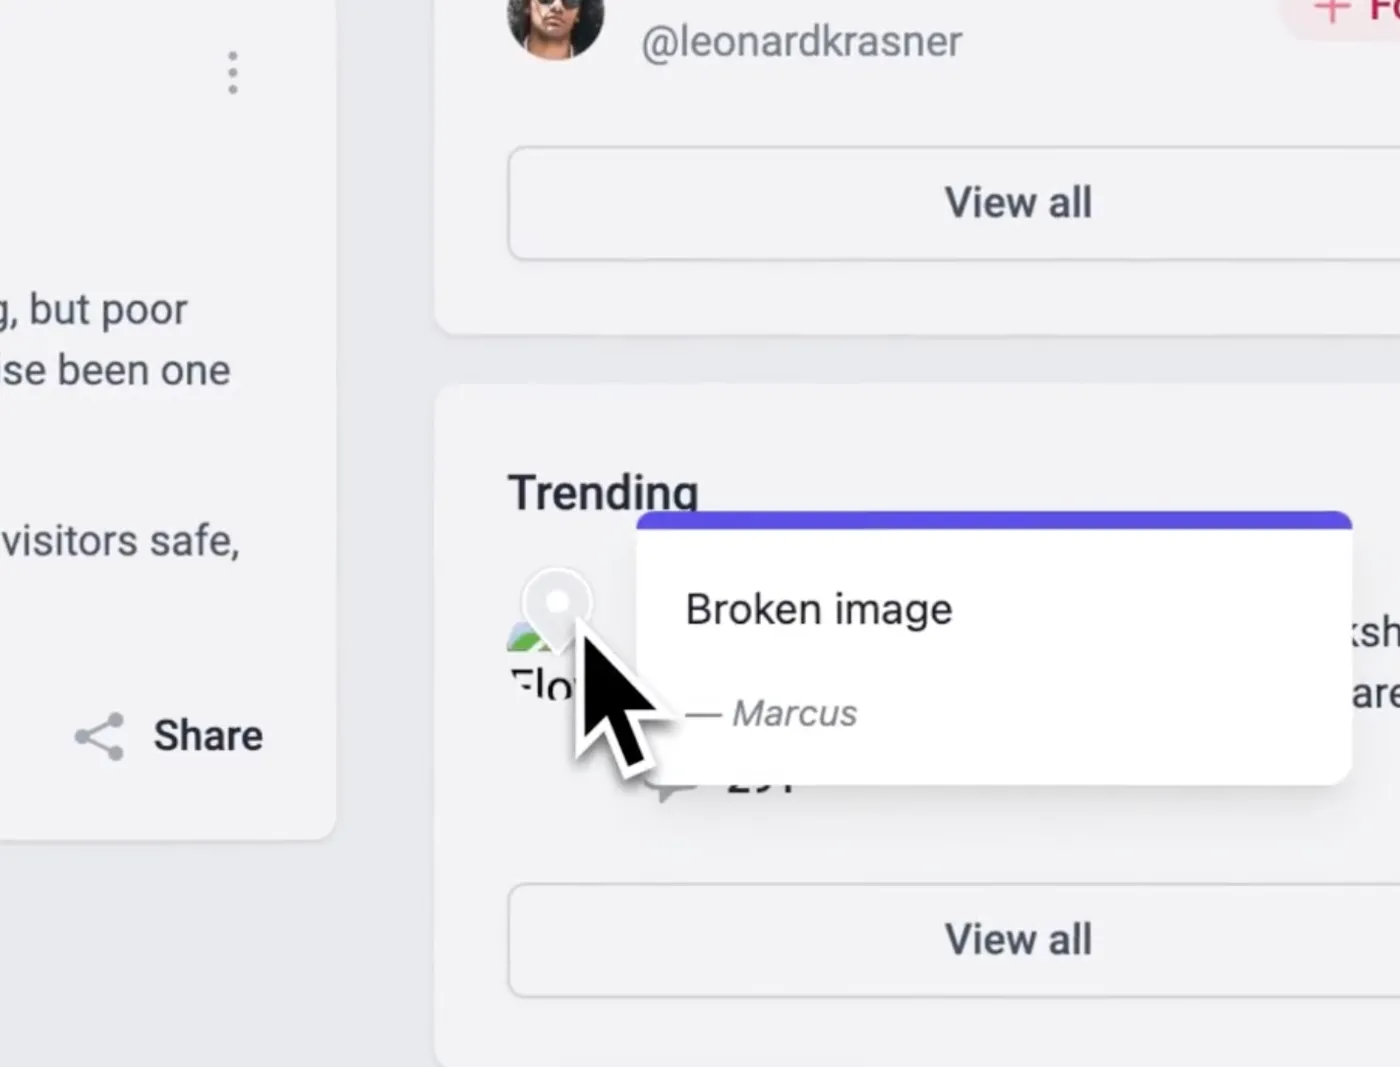
Pins are placed where feedback has already been submitted to reduce duplicates.
When everyone can see what's already been discussed, jump into existing conversations, and track progress right where they work - that's when you start launching websites faster and with fewer headaches. No more digging through email threads or wondering if you've missed important feedback.
Recently, there was a lively discussion in TheAdminBar - a popular Facebook group for WordPress agencies - where teams were comparing different tools for reviewing websites with clients.
Feedbucket kept coming up in the conversation, with agencies sharing their experiences:
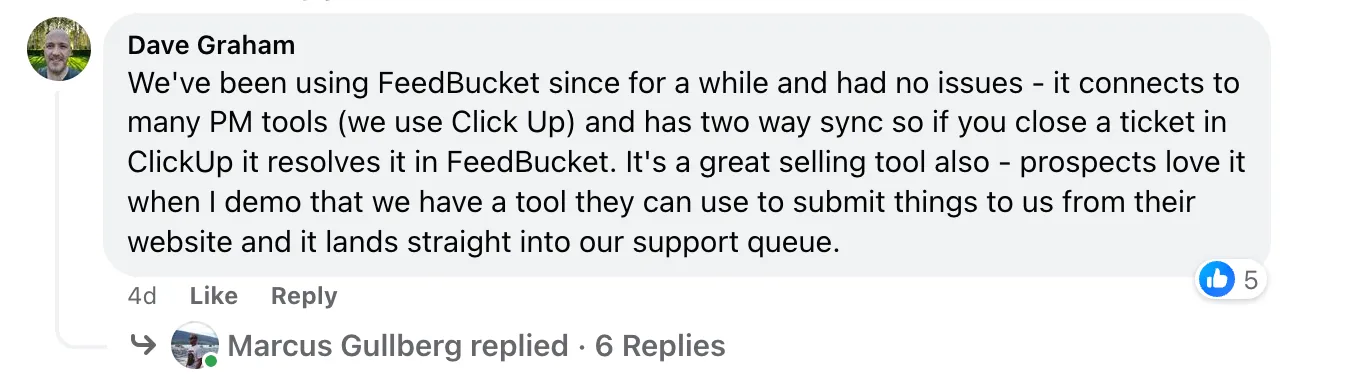
We've been using Feedbucket since for a while and had no issues. It connects to many PM tools (we use ClickUp) and has two way sync so if you close a ticket in ClickUp it resolve it in Feedbucket. It's a great selling tool also - prospects live when I demo that we have a tool they can use to submit things to us from their website and it lands straight into our support queue.
👉 Want to see for yourself? Try Feedbucket free for 14 days, no credit card required.
FAQ
Q1: How to annotate a website with a browser extension
If you're just looking to quickly mark up a website for yourself or share a simple annotation with a colleague, a browser extension can be a good fit. Here's the straightforward way to do it:
- Install the Markup Hero browser extension
- Annotate any website
- Get a shareable link for the annotation that you can send
Q2: How to annotate a website as a student, reseracher, or teacher
The best tool to use here would for sure be Hypothes.is.
